
 There’s something about pies and men…well women, too. From time to time we have folks over for dinner and when The Goddess decides it will be pie for dessert, she’s always bemused by the reaction people (read “men” here!) have. They get sort of glassy-eyed, perhaps a tear forms and then they get this satisfied grin, “There’s going to be pie for dessert….”Now, I know some of these people did not have mother’s that made pie. And probably not pies like my mother made. But there is something about pie that makes people relive a childhood they may or may never have had, but in a very good, warm way. And The Goddess is okay with that. Any good memory from childhood is to be promoted. The Goddess loves to make pies, but really, she’ll take an apple crisp any day over an apple pie. Pie crust just doesn’t do it for her, but for The Latin Lover and The Sons and The Ones with them, pie is their dessert. And it’s the crust that seems to make their eyes sparkle. The Goddess loves sparkling eyes (this sparkling pits thing leaves her cold, but that’s another thing entirely!), so she usually makes 2 pies of each type. In our abode, pie is dessert one day, and it is breakfast the next day. And why not?
By the way, it will take The Goddess much longer to explain this process than it will for you to actually make the pastry. Seriously, it’s true….there are a few essentials to making great pie pastry. The key to the best pastry possible, is cold. We’re talking freezer-cold. The Goddess plans ahead…revel in this because it doesn’t happen often. She combines the dry ingredients the night before and puts them in the freezer. She tosses the butter, shortening, lard or whatever she’s using for the fat in the crust, into the freezer as well. She gets her pent-up aggression out by beating the meanness out of the egg, in a 2-cup measuring cup, adds the vinegar and vodka, fills the cup to the “one cup” line on the measure, covers the cup with plastic wrap and stows it away in the fridge. In the morning, she puts some ice in water and lets that chill nicely for a few minutes. So everything is set for a morning adventure in pasty making!
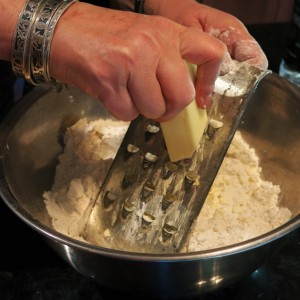 You’re going to grate the fat on the largest holes of a box grater. It’s easy to grate the frozen butter, lard, shortening, etc. Just grate the fat right into a large bowl that contains the flour mixture.
 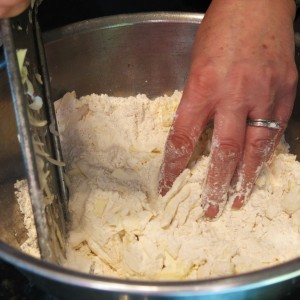 You want nice, large, flat pieces of the fat of choice, so when they melt during baking, they will produce the layers of flaky goodness that is the nature of great pie pastry. You’re going to use your fingertips to toss the shreds with the flour mixture.
 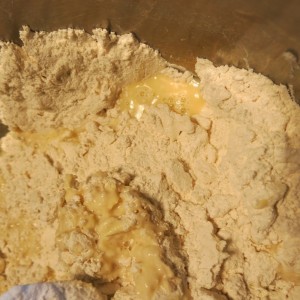 Make a well in the center, pour the chilled egg-liquid mixture into the well, and bringing the flour from the edge into the center.
The key to learning and feeling comfortable making good pie pastry is practice. The more you make pastry the more you’ll realize when the consistency is right. You want the mixture to just hold together. If it still feel too dry, begin adding the ice water 1 tablespoon at a time and mixing. Try to keep the mixing at a minimum and work quickly to maintain the cold temperature. 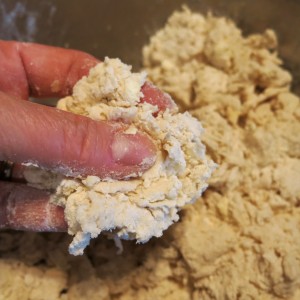 The pastry should begin to hold together when you gently pinch some of it together. This needs a tad more water; this is a bit too dry and crumbly. It shouldn’t be wet. Having said all that, it is slightly better that it be a bit too moist than a bit too dry.
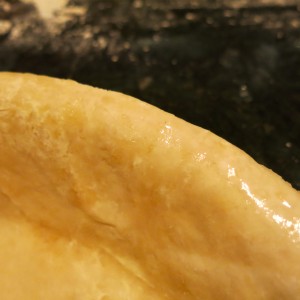
 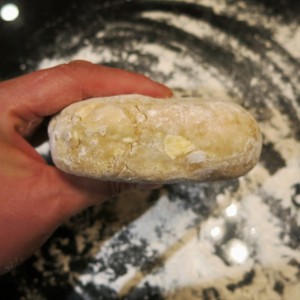 You should be able to shape it into a disk that is reasonably smooth. You should be able to see streaks of the butter, etc. That’s a good thing…a very good thing. You can store the prepared pastry dough in the fridge for no more than 2 days, but you can freeze it for at least 1 month.
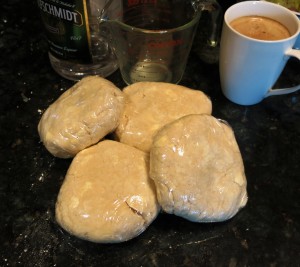 To freeze: You may wrap the disc of dough in plastic wrap; I double wrap. Seal the disc(s) in a freezer bag and place it in the freezer. When you need one, remove it the night before you wish to use the dough; place it in the refrigerator to thaw overnight. It is also nice to have a pastry-lined pie plate in the freezer, for use at a moment’s notice. You’ll wrap that in plastic wrap and then in foil and freeze. Just as an aside, coffee is present in my life on an on-going basis, so you’ll sometimes see a cup sitting in the picture, like this. Please overlook it.
Perfect Pie Pastry
- 5 3/4 cups all-purpose flour*, chilled
- 1/4 cup cornstarch, chilled*
- 2 tablespoons sugar
- 1 teaspoon salt
- 1 teaspoon baking powder (optional—see NOTE)
- 2 cups frozen lard**
- 1 egg
- 4 tablespoons cold vodka
- 2 teaspoons cider vinegar or lemon juice
- Iced water or milk
*6 cups of cake and pastry flour may be substituted for the all-purpose flour and cornstarch
**Lard makes the flakiest and best pie crust…it just does. If for whatever reason you don’t wish to use lard, simply substitute 2 cups of frozen solid shortening (freeze for at least 30 minutes). If you wish to use a shortening/butter combination, I use 2/3 cup frozen butter and 1 1/3 cups frozen vegetable shortening (like Crisco®).
Place the flour, sugar and salt in a large bowl and chill in the freezer for at least 4 hours or overnight.
Using the larger holes on your grater, grate the lard into the flour. Using your fingertips (the palms of your hands are too warm—heat is the enemy of good pie crust) the lard and the flour together. Return the mixture to the freezer for 15 minutes.
Break the egg in a 1-cup glass measuring cup; beat the egg well. Add the vodka, and vinegar; fill the cup to the 1 cup level with iced water or milk. (It is imperative to use iced water of milk. I usually put the water/milk in the freezer when I start to mix the lard into the flour.) Remove the pan with the flour/lard from the freezer; push the flour to the edge of the pan, making a crater in the middle. Add most of the liquid ingredients (I hold back a couple of tablespoons, just in case the flour has more moisture than anticipated…you may need to add them back in at the end and possibly even a bit more iced liquid.) Take a rubber spatula (or you fingertips) and slowly and gently fold the flour into the liquid. DO NOT OVERWORK. As soon as it holds together nicely (you should be able to pinch a piece together and not have it be too floury or too sticky) drop the dough onto the floured counter and knead 3 or 4 times. Form into discs and wrap in plastic wrap. Chill for at least 1 hour. This will help the gluten relax so you will be able to roll the dough more easily and have a more tender crust.
When ready to make your pie, remove the disc from the fridge, let sit on the counter for 10 minutes, then roll out on a lightly floured surface, to the desired size. Remember to roll from the center outward using short, quick strokes. Roll the dough to a thickness of slightly more than 1/8-inch. Fit the dough into the pie plate, being careful not to stretch the dough or it may shrink as it bakes. I place the dough-lined pie plate in the freezer while I prepare the filling or roll out the top crust.
When making a 2-crust pie, moisten the edge of the bottom crust with water and place the top crust over the pie. Press gently on the two edges, the top crust should overhang the bottom crust by at least 1/2-inch. Fold the additional crust under the edge of the bottom crust, sealing it well. Make a decorative edge by pinching the edge, or seal with the tines of a fork.
Bake the pie in a preheated 400°F oven for 10 minutes; this sets the crust. Lower the heat to 350°F and continue to bake according to your recipe or until the filling is tender and bubbly.
NOTE: I like to brush the top crust of a two-crust fruit-filled pie with heavy cream (it browns beautifully) and sprinkle it with coarse sugar. I add 1 teaspoon baking powder with the flour when I am making crust for savory pies. I like how the finished crust behaves with a savory filling. Also, you may use 1/2 cup apple cider for 1/2 cup of the liquid (omit the sugar), if you wish. This is great with apple pies. You may add shredded cheddar or Parmesan cheese to the crust; cinnamon; grated orange or lemon zest; finely minced, toasted nuts, cracked black pepper, minced fresh or dried herbs, etc. (mixed with the flour) depending on the filling you are going to use. This adds texture and well as flavor.
Perfect Pie Pastry Recipe©Marcia Lahens 2015. All rights reserved.
You may be wondering, what the Hell is The Goddess thinking adding vodka (or rum) to pie pastry? Alcohol interferes with the development of gluten and that’s a good thing. If gluten develops, and isn’t allowed to relax (that’s why you let dough rest overnight, if possible) you will probably have tough pie crust…I’m talking cardboard-like consistency and no one wants that.
Another thing, you may add flavorings to the dough, depending on what type of pies you are making. I’ve added apple pie spice, herbes de Provence, cumin or caraway seeds, shredded citrus peel, etc…you get the idea. When making apple pies, sometimes I substitute part apple cider for the water with the eggs.
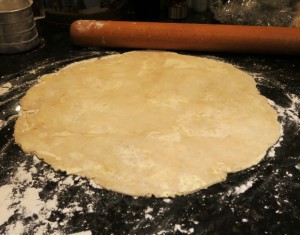 To roll out the dough, you need to let the disk sit on the counter for 10-15 minutes. Dough that’s too cold will crack around the edges. For rolling out dough, you can watch a video here and there are some great pictures and options, here.
 A couple of last things, if your crust tears, simply tear a piece of unneeded, rolled out dough from the crust, dip your finger into some cold water and run it around the edge, then press them gently together. The water acts like glue and because the “mend” is on the bottom crust, it will be covered by the filling, so it will be hidden. Moistening the edge is necessary to seal the top crust to the bottom.
 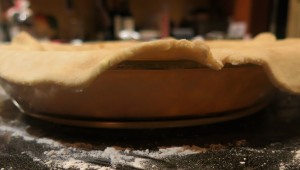 Do NOT stretch the dough to fit into the pie plate. Simply ease it in. If you stretch it, dough may shrink from the edges of the plate during baking. This is very unwanted when you are blind-baking (without a filling) a crust. If you are making a juicy, fruit pie, make a nice, high edge, just in case the juices spill out. It’s also a good idea to place the unbaked pie on a cookie sheet before placing it in the oven. It just makes moving the pie around easier.
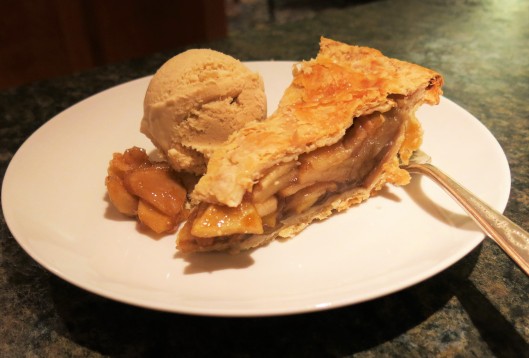
This posting is just focused on the pastry. We will make and apple pie and a pumpkin later, on another post. Now, go make some pie crust and a memory for someone you love.

Pingback: Cider-Bourbon Caramel Apple Pie | Goddess Cooks
Do you have any thoughts on gluten-free pie crust? I would be eager to hear! 🙂
LikeLike
Annalise,
I make coconut crusts and graham cracker crusts using gluten free crusts, but I haven’t actually made, with my two little hands, the more tradition crust used for fruit pies. But, I have used King Arthur’s gluten-free all-purpose flour in other things, and it worked really well. If you want, use the Pie Crust Perfection recipe, but I would halve it, just in case it doesn’t work. I would add about 1 1/2 teaspoons of xanthan gum, add 2 tablespoons lemon juice and omit the vodka (you don’t need it in anything gluten-free) and mix it up accordingly. A friend of mine who’s a celiac, uses the following recipe. She’s a great cook and I’ve eaten pie at her home and it had a delicious crust. Also, this website has always worked for me:
http://www.seriouseats.com/recipes/2013/11/gluten-free-pastry-crust.html
I’m sorry I can’t be more help, but please do let me know how it works for you. I know that one day I will, in fact, make one.
Here are a couple more options, if the one above isn’t to your liking.
http://www.kingarthurflour.com/recipes/gluten-free-pie-crust-recipe
https://simplygluten-free.com/blog/2013/11/perfect-gluten-free-pie-crust-recipe.html
LikeLike